|
|
|
|
|
|
|
|
|
|
|
|
|
Build a Bridge | Bridge Photos |
|
||||||
|
|
Pick a Bridge |
|
Bridge Models |
|
|||||
| Home |
|
Contact | |||||||
|
|
|
||||||||
|
|
|
|
|
|
|
|
|
|
|
|
|
Build a Bridge | Bridge Photos |
|
||||||
|
|
Pick a Bridge |
|
Bridge Models |
|
|||||
| Home |
|
Contact | |||||||
|
|
|
||||||||
These arch bridges are incredibly strong, yet very flexible in case of overload. To fully utilize this strength and enjoy maximum life, requires firm footings.
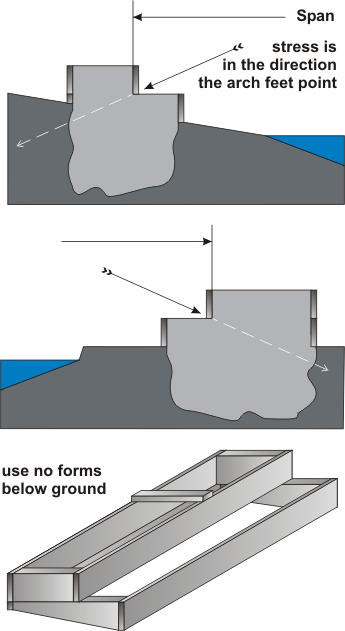
An arch with this geometry has more horizontal force on the footings than vertical force. A short bridge, with only light loads, might stand for decades on cinder blocks, if you keep the arch feet off the concrete and mud.
A larger span, with heavier loads, will definitely start to sag over time, the feet slowly spreading with repeated wet/dry cycles, and eventually become unsafe.
If a load has bent the bridge a small amount, that's no problem, as long as the deck can bounce back. If, however, the load has managed to spread the arch feet by a fraction of an inch, it won't bounce back all the way, taking the new form, until the next load repeats the process, a fraction of an inch at a time.
All bridges shown, will allow my recommended load, even with arch feet unrestrained (do not try this at home :-), but how often and for how long, depends on the footings.
|
A — The force on footings is in the direction the arch feet point. B — dig a hole roughly to cross-section shown. Soft soil requires more mass for your footing. Rocky, gravely soil requires less mass for your footing. Fill hole with concrete, washed rocks (easier than mixing more cement), some re-bar, steel fencing or wire mesh, whatever's handy. The metal can help keep your footing from crumbling over time, especially with freez/thaw cycles. Raise part of the footing a few inches above ground level, to keep the arch feet above the dirt and leaves, etc. C — Don't use forms below ground. Your footing will get the best bite against undisturbed soil. |

|


|
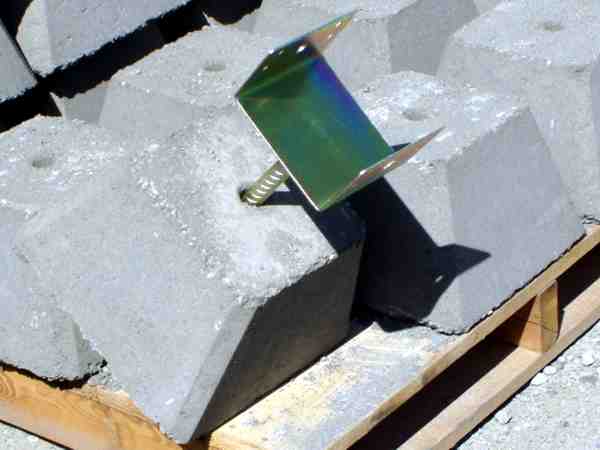
An arrangement using a post saddle like this might also work for smaller bridges.
Lumber yards have a variety blocks and hardware that may suit you.
|

|