|
|
|
|
|
|
|
|
|
|
|
|
|
Build a Bridge | Bridge Photos |
|
||||||
|
|
Pick a Bridge |
|
Bridge Models |
|
|||||
| Home |
|
Contact | |||||||
|
|
|
||||||||
|
|
|
|
|
|
|
|
|
|
|
|
|
Build a Bridge | Bridge Photos |
|
||||||
|
|
Pick a Bridge |
|
Bridge Models |
|
|||||
| Home |
|
Contact | |||||||
|
|
|
||||||||
Typical Bolt & Screw Diagram (PDF)
|
This is an extremely efficient design and,
compared to conventional bridges, components are light.
Terrain permitting, a bridge can be erected by muscle power alone
and a relatively small beer budget. There is a small variety of duplicated parts and identical parts are interchangable. Try to understand the way parts fit together before actually starting erection. If anything doesn't make sense, please ask. These are big bridges. |
The fact that components are light also means
that the arch assembly, during erection, is an extremely
floppy structure. Adding light parts, one at a time,
it's easy to forget that you are trying to float
1~2 tons of lumber in the air. A minimum of 4 persons is required to erect a large arch assembly. 2 persons can add and bolt components to the structure and the other two, one on each side of the bridge, need to ensure the structure does not lean sideways too far and possibly suffer damage. After starting erection, re-read this page and some of the comments will make more sense. |
|
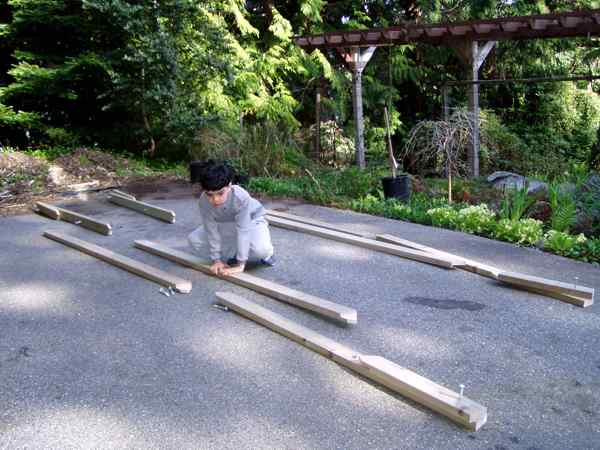
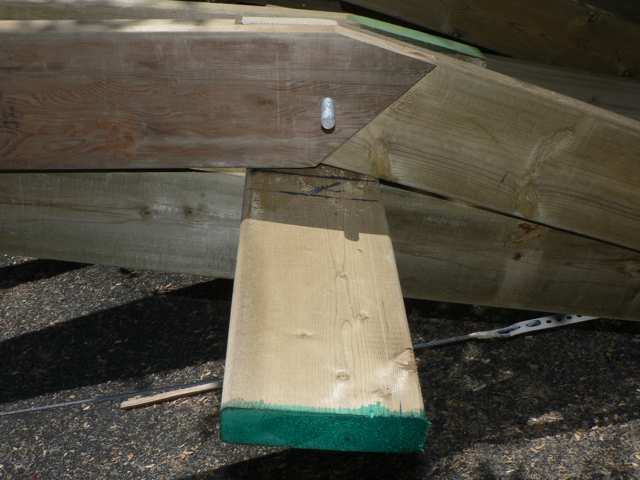
• Lay out the components so that they are handy
but not in your way. Bolt heads and large washers go on the inside of the arch and small washers with nuts go on the outside of the arches. On inside arches, bolt direction doesn't matter. |
|
|
• All joists point in the same direction except at one end,
where the end ramp and joist are fastened
to the same arch peak with one longer bolt,
on the inside of the arch, as you see on the far end of this small arch. Note that the pointy joists alternate, side to side, with the arch peaks. |
|
|
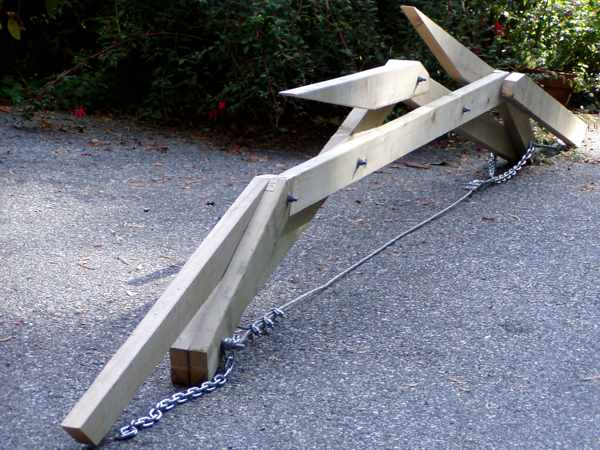
• Take a long and a short one of the partial arch pieces
and insert a 5-1/2" bolt through the blunt end,
at the arch foot of the outboard arches. Let 2-1/2" of thread stick out for the end post brace. For the inside arches use a 4" bolt. Set this end in the footing. When you have your 4 arches started, slide the cross-beam under the short piece. |

|
|
• Drop a scrap piece of lumber, of the appropriate length,
between the arches to maintain the spacing. Wire the bolts, at the arch feet, to the footings. If you neglect to do this, the arch feet will creep as you work and make alignment progressively more difficult. |

|
|
• Push the cross-beam a bit past the bolt hole above it. Lift the longer piece and add the next arch piece with a bolt through the crossing. |

|
|
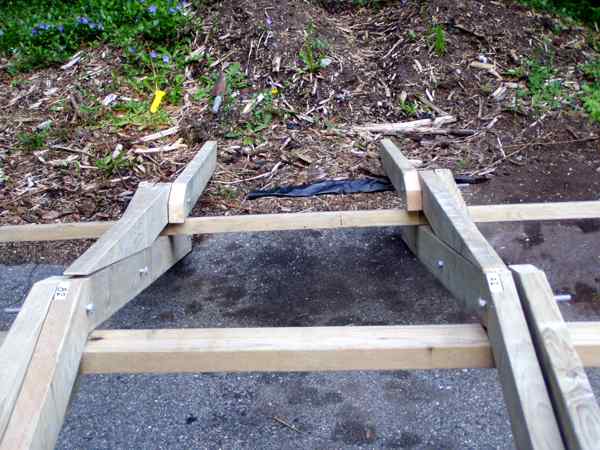
• Space the arches so the X mark on the cross-beam (for the railing post)
is just outside the arches. Line up the other marks on the cross beam with the inside arches. Screw the cross beam to the arch piece underneath to fix the arch spacing. Do this as you go along. Doing it later will be more difficult. These screw holes are not predrilled. Note that the pointy joist hangs above that screw. The joists on the inside of the arch peaks should be bolted to the arch peaks now. The joists on the outside of the arch peaks may be slipped onto their bolt later when you add the railing posts. |
|
|
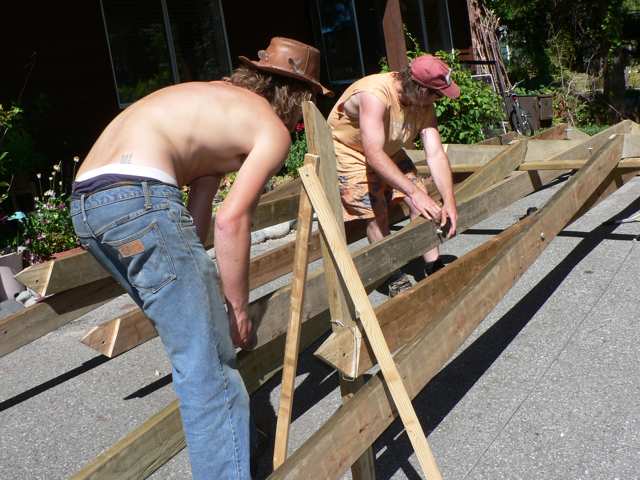
• Add another set of pieces. As you screw down the cross beam, add the pointy joists on the appropriate side of the arch peaks. The outside arches have a longer bolt through the arch peak, for the railing post which you can add from above, after the arch assembly is erected and solid in the footings. |


|
|
• When you have 2 arch segments completed,
straighten the arches so they line up and stand vertical. With short screws through the strap ends only, add the galvanized strap for lateral stability. If necessary, you can adjust individual straps later. Before you add decking, also screw the straps to the inside arches. Depending on the length of your end ramps and the terrain, you may need to get a bit creative adding some diagonal strap to the short end segments. |

|
|
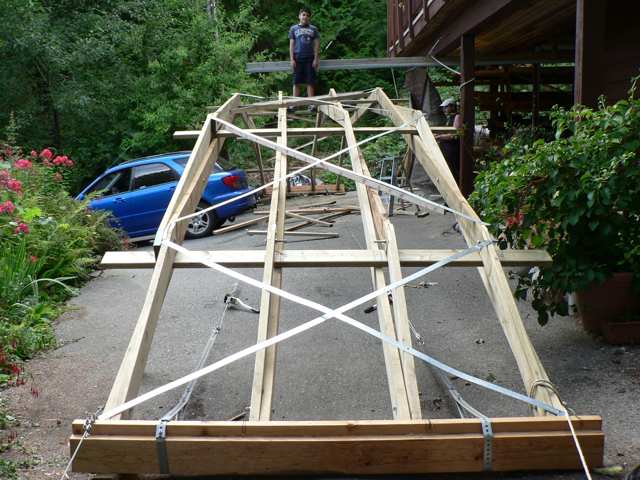
• When you have 4 segments completed you'll need to raise
and support the arch assembly at approximately 2/3 span,
to aim the arch feet at the other footing and shoe-horn the feet
into the "step". |


|
|
• Lifting the arch will shorten it enough
to drop into the step. |


|
|
• Complete this end of the arch assembly. |


|
|
• |


|
|
• When the complete structure is standing in the footings,
bolt any remaining joists to the arch peaks. Sight the length of the arch assembly and adjust any galvanized straps necessary to assure the arches are standing straight and plumb. Use a plumb bob of some kind. When working on slopes everything becomes an optical illusion. Using the pre-drilled holes, screw the pointy part of the joists to the arch piece on which they lie. Screw down the decking. |

|
|
• Attach railing posts and the end post braces at one end only. • Attach railings and side post braces. • After everything, including decking, is screwed down, attach the end post brace at the other end. |


|
A final consideration:
During erection, do not tighten nuts.
• You see on the right that 2 bamboo slivers don't work as a beam bridge.
• In the middle, fixed as an arch between two "footings", they look promising but will obviously tip sideways, even with the lightest load.
• On the left, with only some plain paper for a "deck" as lateral bracing, they support over 4 lbs with no problem.
After the arch assembly is completely erected, and railing posts are attached, snug up the nuts. Don't overtighten them as it will only crush the wood unneccessarily. Bolts carry no load and merely act as clamps to keep the wood lined up.
Bolts through the arch peaks can be temporarily removed, with no great difficulty, after the arch assembly is standing.
If you have difficulty inserting a bolt through an arch peak, despite cross beam & lap joint seemingly aligned for a reasonable fit, just ream out the misaligned bolt holes with a drill bit of your bolt size.
Before the arch is shoe-horned into the footings, it may seem longer and flatter than design so, depending on how you are holding or lifting it, the fit of the lapjoint may seem off. Once in place, you should be able to wiggle the arch in its proper shape.
This design has tremendous strength and load capacity, but only as long as the arches remain vertical.
For maximum strength and load capacity:
- Set up the arches symetrically, a mirror image of each other.
- Make sure the arches stand plumb on your footings.
- Consider fastening the cross-beams directly to the arches, especially if the cross-beams are a loose fit.
- Fasten your deck securely and ensure that several deck screws fix the pointy part of the joists well to the arch. This forms a curved truss for maximum arch efficiency.
- A well fastened deck is required to assist the cross-beams in maintaing the structure in a vertical position, even with lateral stress under load.
In the US 84Lumber can have
The longer the bridge and the heavier the load, the more important this becomes. On smaller bridges you might guarantee lateral stability by gluing and screwing the deck for each section in panels before laying those on the arch assembly with a few screws.
On larger bridges an easy way to guarantee lateral stability and erecting a straight arch assembly, is 16ga galvanized X-strap across each section before screwing down the deck planks.
You can also use this strap for easy arch foot protection & isolation
Simpson Strong-Tie
drop ship you a roll of
CS16Z-150 16ga 1¼" galvanized coiled strap
USPconnectors.com
is another supplier
RS150 CS16
In Canada Home Hardware can supply either one.
